
Get Your Free Kintsugi Coloring Book
Embark on a journey through the mindful practice of coloring and Kintsugi combined.
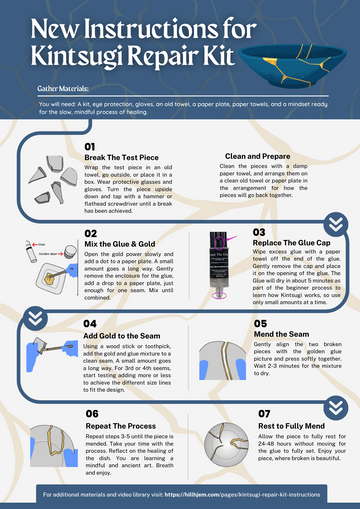
Take a look at these updated instructions.
We found errors in the original instructions and want to make it right so that you can enjoy the process this kit provides.
Take a look at this PDF, or view step by step instructions below.
Please don't hesitate to reach out with questions!
support@littleredhills.com
With Appreciation,
Rianna
Step by Step instructions to learning your Kintsugi Repair Kit
Where Broken Becomes Beautiful
It is very important to practice the process with a test piece before trying to gold and glue on one of your valued items.
Step 1: Break the Test Piece
Wrap the test piece in an old towel, go outside, or place it in a box. Wear protective glasses and gloves. Turn the piece upside down and tap with a hammer or flathead screwdriver until a break has been achieved.
Think of this step as the first step in the healing process. It is the decision to keep the piece, and mend it.
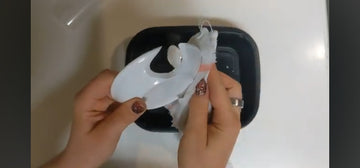
Step 2: Clean and Prepare
Clean the pieces with a damp paper towel, and arrange them on a clean old towel or paper plate in the arrangement for how the pieces will go back together.
We are creating something beautiful to heal and make better the piece that was broken.
Step 3: Mix the Glue & Gold
Gently remove the enclosure for the glue, add a drop to a paper plate, just enough for one seam, about the size of a dime, a little goes a long way. Open the gold power slowly, and add a sprinkle to the glue. Mix until combined.
The glue will start to dry once exposed to errors. Properly replace the cap to ensure reuse of the kit from the test piece to your next item to mend.
Step 4: Replace The Glue Cap
Wipe excess glue with a paper towel off the end of the glue. Gently remove the cap and place it on the opening of the glue. The Glue will dry in about 5 minutes as part of the beginner process to learn how Kintsugi works, so use only small amounts at a time.
Let's mend.
Step 5: Add Gold to the Seam
Using a wood stick or toothpick, add the gold and glue mixture to a clean seam. A small amount goes a long way.
Once you've practiced the first step and are repeating the seems, on the 3rd or 4th seems, start testing adding more or less to achieve the different size lines to fit the design.
Step 6: Mend the Seam
Gently align the two broken pieces with the golden glue picture and press softly together. Wait 2-5 minutes for the mixture to dry enough for the piece not to move or to be able to stand alone.
Breath and enjoy.
Step 7: Repeat The Process
Repeat steps 3-5 until the piece is mended into a whole again. Take your time with the process. Reflect on the healing of the dish. You are learning a mindful and ancient art.
Allow the mending to fully set and become stronger.
Step 8: Rest to Fully Mend
Allow the piece to fully rest for 24-48 hours without moving for the glue to fully set. Enjoy your piece, where broken is beautiful
Kintsugi Repair Kit Instructions
Question Name
Answer Content
Question Name
Answer Content
Question Name
Answer Content
Question Name
Answer Content